HTML Attributes
In HTML almost every element has
attributes. The basic purpose of the attribute is to provide additional information about
element.
2.
The src Attribute
Src attribute is used in
image and script tag. In image tag src hold image path and then image show same
in script tag src hold external JavaScript file path address and then action
perform.
 |
| HTML Atribute Example |
<!DOCTYPE HTML>
<HTML>
<head>
<title>HTML Attributes</title>
</head>
<BODY>
<img src="image.jpg">
</BODY>
</HTML>
Result
src="image.jpg"
src is an attribute while image.jpg is an image name. image name
can be different. Here one thing is very important when the image and HTML file in
which you want to add an image are in the same folder then your src
is like this
src="image.jpg"
but when your image location is different. Then you can
access image like this
<img src="../image2.png">
 |
| HTML Atribute Example 2 |
Double dots and slash are used to go back to the previous folder if
image is there then select otherwise again put double dots and slash and find
folder.
3.
The width and height Attributes
Width and height attributes are used to set the height and width of the element. Lets we use these attribute in the image tag
and now we display images.
Code:
<!DOCTYPE HTML>
<HTML>
<head>
<title>HTML Attributes</title>
</head>
<BODY>
<img src="image.jpg" width="100px" height="100px">
<img src="../image2.png" width="200px" height="200px">
</BODY>
</HTML>
Result
 |
| HTML Atribute Example 3 |
4.
The alt Attribute
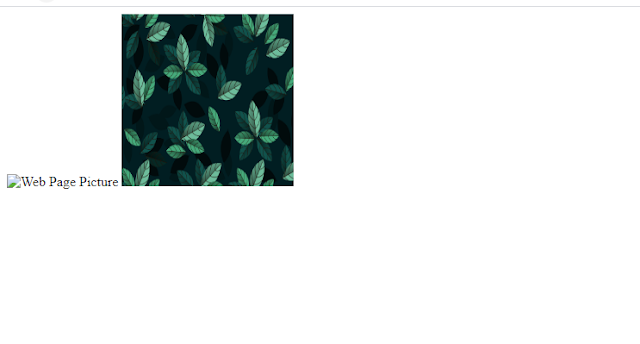
Alt attribute used for the image. Alt is alternative text. Some time image is not
loaded due to slow internet and wrong src than this text show. For example, in the last example, we will provide the wrong path in one image and then will see the
result.
Code:
<!DOCTYPE HTML>
<HTML>
<head>
<title>HTML Attributes</title>
</head>
<BODY>
<img
src="image.png"
width="100px"
height="100px"
alt="Web Page Picture">
<img
src="../image2.png"
width="200px"
height="200px"
alt="Plants Picture">
</BODY>
</HTML>
Result:
 |
| HTML alt Atribute Example |
In image 1 I provide the wrong image extension. Then you see
result in alternative text show for image 1.
5.
The style Attribute
Style attribute uses to add style in
elements like width, height, position, color etc.
Let apply some style to the image.
Code:
<!DOCTYPE HTML>
<HTML>
<head>
<title>HTML Attributes</title>
</head>
<BODY>
<img
src="image.jpg"
style="border-radius: 100%;"
width="100px"
height="100px"
alt="Web Page Picture">
<img
src="../image2.png"
width="200px"
height="200px"
alt="Plants Picture">
</BODY>
</HTML>
Result:
 |
| HTML Style Atribute Example |
In this result you can see that one
image look like circle and second square. Border radius property use to round
the corner of image.
style="border-radius: 100%;"
here I use 100% you can also use px.
For circular image you will need to provide width of image in pixel. If you ignore
% form border-radius. Like this
style="border-radius: width-of-image-in-px;"
this only applicable if width and
height of image are same.
6.
The lang Attribute
This attribute used in html tag. The
purpose of assist search engines and browsers.
Code:
<!DOCTYPE HTML>
<HTML lang="en-us">
<head>
<title>HTML Attributes</title>
</head>
<BODY>
<img
src="image.jpg"
style="border-radius: 100px;"
width="100px" height="100px"
alt="Web Page Picture">
<img
src="../image2.png"
width="200px"
height="200px"
alt="Plants Picture">
</BODY>
</HTML>
7.
The title Attribute
Tittle attributes provide extra information
about the element when the user mouse over the element and a tooltip opens. Let implement
title in code.
Code:
<!DOCTYPE HTML>
<HTML lang="en-us">
<head>
<title>HTML Attributes</title>
</head>
<BODY>
<img
title="Image 1 is Circular..."
src="image.jpg"
style="border-radius: 100px;"
width="100px"
height="100px"
alt="Web Page Picture">
<img
title="Image 2 is Square..."
src="../image2.png"
width="200px"
height="200px"
alt="Plants Picture">
</BODY>
</HTML>
Copy this code and set image src run
the code. Hover mouse over images then you can see result.


0 Comments
Thanks